
 A poorly inspected custom vanity sample can derail an entire multi-unit development project, triggering catastrophic budget overruns and installation failures. When you approve a prototype, you are not just approving one unit; you are signing off on the manufacturing standard for hundreds or thousands to follow. A subtle color mismatch, a weak drawer joint, or a misaligned hinge on that first sample will be replicated across the entire production run, creating a costly and time-consuming problem that is only discovered during the final installation phase.
This guide provides a technical standard operating procedure for the sample approval process. We will cover the specific inspection points required to validate quality, from checking color matching against Delta E limits to stress-testing construction joints and verifying hardware functionality. Following this process ensures the “Golden Sample” you sign off on is a true representation of the quality you will receive in your final delivery, eliminating manufacturing ambiguity and protecting your project timeline.
The “Golden Sample”: What Is Its Specific Purpose?
A “Golden Sample” isn’t just a prototype; it’s the physical contract that locks in all quality specifications—from materials to finish—before mass production begins, serving as the definitive benchmark for every unit that comes off the line.
Establishing a Tangible Quality Benchmark
The golden sample is the single, approved version of a product that serves as the definitive standard for mass production. It aligns all teams—from engineering to manufacturing to the client—on the exact specifications for materials, design, and performance before full-scale operations begin. This physical reference eliminates ambiguity and ensures that what was approved is exactly what gets built.
- It acts as the final, approved physical reference before manufacturing starts.
- It provides an objective standard for all ongoing quality control checks.
- It ensures every stakeholder agrees on the final product’s look, feel, and function.
Reducing Production Risks and Defects
By creating a perfect benchmark, manufacturers can identify and correct potential issues in their processes before scaling up. Production teams use the sample to physically compare units on the line, catching deviations in color, dimensions, or assembly early. This practice prevents widespread errors, stops “quality fade” over long production runs, and avoids costly rework down the line.
- It allows manufacturers to optimize production methods before committing to large volumes.
- It is used to prevent “quality fade” by maintaining a consistent standard over time.
- It reduces miscommunication between different suppliers or regional teams.
Serving as a Contractual Reference Point
The golden sample functions as a binding part of the manufacturing agreement. If a dispute about quality arises, the sample is the objective evidence used to resolve it. This protects both the buyer and the manufacturer by creating a clear, shared understanding of the expected outcome. Any production unit that fails to meet the standard set by the golden sample can be rejected with clear justification.
- It forms the basis of the quality agreement between the supplier and the customer.
- It minimizes disagreements over product specifications and reduces financial risk.
- It guarantees consistency for all future production batches based on the original agreement.
Sample Lead Times & Air Freight: What Costs and Timelines Should You Expect?
Choosing air freight for samples is a strategic decision to compress project timelines, trading significantly higher costs for a delivery window measured in days, not weeks.
When evaluating a new supplier, getting a physical sample quickly is critical for decision-making. The two primary shipping methods, air and ocean freight, present a clear trade-off between speed and cost. Understanding these differences helps you set realistic budgets and timelines for your sample approval process, ensuring you don’t create unnecessary delays in your production schedule.
Air Freight Costs: What to Budget in 2026
The air freight market has largely stabilized since the supply chain disruptions of the early 2020s. While rates are variable, you can expect to pay a premium for speed. This option is best reserved for urgent sample deliveries where the cost is justified by the need to accelerate a project’s kickoff. The final price depends heavily on the specific shipping lane, time of year, and current fuel costs.
- Rates in 2026 typically range from $2–$8 per kilogram. Busy corridors like Asia to the US often command rates above $4.50/kg, especially during peak seasons.
- Expect air freight to cost between 5 and 10 times more than ocean freight, a direct reflection of its value for time-sensitive approvals.
- Primary cost drivers remain fuel surcharges, available cargo space on aircraft, and seasonal shipping demand.
Air vs. Ocean: Comparing Delivery Timelines
The single greatest advantage of air freight is its speed. A project can stall for weeks waiting for a sample to arrive by sea, creating significant downstream delays. Air shipping collapses this waiting period, allowing your team to inspect, approve, and move to mass production much faster. For any project on a tight schedule, air freight is the only practical choice for sample delivery.
- Standard air freight delivers samples globally within 1–5 business days, allowing for a near-immediate review process.
- In contrast, ocean freight requires a much longer transit time, typically falling between 20–30 days from port to port.
- This speed is essential for maintaining tight production schedules where a quick sample approval is required to begin manufacturing.
Create Your Standout Bathroom Cabinet Line
Checklist: Is the Color Matching Within the Delta E Limit?
Relying on the human eye for color approval is a recipe for disputes; objective data from a spectrophotometer using the Delta E 2000 standard is the only reliable way to guarantee color consistency.

Understanding Delta E 2000 as the Standard
By 2026, the manufacturing industry has fully adopted Delta E 2000 (CIEDE2000) as the primary metric for quantifying color difference. This formula is the standard because it best aligns with human visual perception, giving us a reliable way to assess color accuracy for finished products like bathroom vanities. Using a precise numerical value removes the subjectivity that causes conflicts when evaluating if a production unit matches the approved “Golden Sample.” We use this standard to guarantee color consistency across different materials and production runs.
| Delta E 2000 Value | Perceptual Difference | Commercial Application |
|---|---|---|
| 0.0 – 1.0 | Imperceptible difference (theoretically identical). | Reserved for scientific or metrology use. |
| 1.0 – 2.0 | Very slight difference, only visible to a trained eye. | High-end automotive paint; premium branding. |
| 2.0 – 3.5 | Noticeable difference upon close inspection. | Standard tolerance for commercial cabinet production. |
| > 3.5 | Obvious and distinct color difference. | Generally unacceptable for finished goods. |
Defining Acceptable Tolerance Levels
Achieving a perfect color match with a Delta E of zero is not practical or cost-effective in large-scale production. The goal is to define and enforce an acceptable tolerance. For commercial applications in the bathroom sector, a Delta E value between 2.0 and 3.5 is the established industry benchmark for an acceptable match. A reading below 2.0 indicates a very close match that an untrained eye would struggle to notice. We establish this target Delta E tolerance with each distributor before production begins to ensure the final product meets project-specific requirements.
Tools and Methods for Objective Measurement
Lighting conditions easily trick the eye, leading to inconsistent color evaluations and disagreements. To eliminate this variable, we use spectrophotometers for objective, data-driven color analysis. These instruments measure the spectral reflectance of a surface to calculate a precise Delta E value, comparing the production unit directly to the master sample’s data. This process ensures repeatable and verifiable results, regardless of ambient light or operator bias.
- Color readings are taken from multiple points on a product—such as the door, side panel, and frame—to ensure uniformity across the entire surface.
- This data-first process verifies that the final product color is an accurate reproduction of the approved sample, providing a contractual basis for quality acceptance.
Checklist: How Durable Are the Construction and Joints?
A cabinet’s long-term value is determined by its structural integrity, not just its surface finish; rigorous joint inspection and material validation are non-negotiable steps to prevent failures from moisture and stress.
Beyond aesthetics, the assembly quality of a bathroom vanity dictates its lifespan. A sample that looks good but has weak joints or poor sealing will fail quickly in a high-humidity environment. This checklist focuses on the mechanical and structural tests that separate a durable product from a potential liability. We verify everything from the precision of control joints to the load-bearing capacity of the final assembly.
Verifying Joint Spacing and Sealant Integrity
A primary quality check ensures all control and expansion joints are properly spaced according to the design blueprint. This precision prevents material stress from temperature and humidity changes. We verify that every seam is protected with high-grade, waterproof sealant to create an impermeable barrier against moisture, which is the leading cause of material degradation in bathrooms.
- Confirm joint spacing meets manufacturing tolerances for material expansion.
- Inspect sealant application for complete coverage, free of gaps or air bubbles.
- Verify sealant material is compatible with the cabinet’s core material (e.g., PVC, plywood).
Assessing Water Penetration and Material Compatibility
To guarantee long-term performance, we assess the cabinet’s resistance to water penetration. Our quality control includes testing material compatibility and connection points to prevent water damage and corrosion before they can start. The choice of core material is the single most important factor in this assessment, as different materials offer vastly different levels of protection.
| Core Material | Water Resistance Profile | Recommended Application |
|---|---|---|
| High-Density PVC | Fully Waterproof. The material is impervious to moisture and will not swell or warp. | High-humidity climates (Middle East, SE Asia) or any bathroom with heavy water use. |
| Full Eucalyptus Plywood | High Water Resistance. Multi-layer construction minimizes absorption and damage. | Premium projects requiring durability and a natural aesthetic (Europe, Australia). |
| HMR MDF | High Moisture Resistance. Engineered to resist humidity but not direct water contact. | Ideal for creating an ultra-smooth lacquer finish in well-ventilated bathrooms. |
- Conduct water spray or immersion tests on sample joints to check for leaks.
- Check that all hardware and fasteners are made from corrosion-resistant materials or are properly coated.
- Ensure all exposed edges, especially on plywood or MDF models, are sealed to prevent moisture absorption.
Documenting Connections and Structural Soundness
Visual inspection alone is not enough. We use photographic documentation during assembly to create a permanent record of each critical connection. This process ensures that every screw, dowel, and bracket is correctly installed, guaranteeing the cabinet’s structural integrity and load-bearing capacity. The sample must withstand practical stress tests that simulate real-world use over many years.
- Photograph key assembly points like drawer slides, hinge mounts, and cabinet-to-wall fixtures.
- Perform stress tests on drawers and shelves to confirm they meet specified weight capacity standards.
- Verify that all connections are secure and that there is no movement or instability in the final assembled product.
Checklist: Does the Hardware Functionality Meet Requirements?
Verifying hardware is a two-part process: confirming it performs its core functions and ensuring it operates reliably within specified environmental and performance constraints to prevent field failures.
Validating Functional Performance and Interfaces
A systematic check confirms that hardware components like drawer slides and hinges perform their core tasks as specified. This isn’t just about opening and closing; it’s about verifying that the mechanisms align with the system-level objectives for user experience and product longevity. For a bathroom vanity, this means smooth, silent operation and proper alignment of all moving parts. All mechanical interfaces, like mounting points and handle fittings, must be correctly documented and tested to ensure they work together flawlessly.
| Hardware Tier | Key Specification | Best For |
|---|---|---|
| Standard | Branded Soft-Close Hinges & Silent Sliders | Cost-sensitive wholesale and project orders. |
| DTC (Upgrade) | China’s Top Brand (Higher cycle life and load rating) | Balancing premium performance with controlled costs. |
| Blum (Premium) | Imported (Austrian engineering and brand recognition) | High-end markets demanding superior reliability and brand trust. |
- Confirm that essential functions like soft-closing mechanisms, drawer load capacity, and hinge alignment meet documented success criteria.
- Check that all mechanical interfaces, including screw hole placements and clearances, operate correctly and match technical drawings.
- Use a traceability matrix to link each hardware requirement back to the overall product goals, such as a 10-year service life.
Assessing Non-Functional Constraints
Beyond basic operation, the hardware must perform reliably within specific limits. This assessment focuses on durability and environmental resistance, which are critical for preventing failures in a bathroom’s high-humidity environment. Overlooking these constraints is a common gap that leads to rust, mechanical failure, and customer complaints. The goal is to validate that the chosen hardware can withstand real-world use and abuse over its expected lifetime.
- Evaluate the hardware’s corrosion resistance against environmental specifications, typically through salt spray testing for metal components.
- Measure durability through cycle testing, ensuring hinges and slides meet or exceed the specified number of open/close cycles under load.
- Validate these constraints through a combination of lab testing and physical trials on the fully assembled sample.
Confirming Regulatory and Standards Compliance
Meeting industry standards is non-negotiable for market access and liability protection. This step involves documenting and verifying that all hardware components comply with relevant regulations for their intended markets, such as material composition rules (e.g., RoHS for lead content) or performance standards. Failing to identify these requirements early can lead to costly rework or blocked market entry.
- Create a checklist of all applicable standards and regulations for the target regions where the vanities will be sold.
- Maintain thorough documentation from hardware suppliers proving compliance for each standard, such as material safety data sheets (MSDS) or certificates of conformity.
- Engage with your manufacturer early to ensure all regulatory requirements are identified and addressed during component selection.
What Common Sample Defects Should You Watch Out For?
Identifying sample defects is a diagnostic process that reveals deeper issues in a factory’s quality management, from raw material sourcing to final assembly protocols.
Material Flaws and Finish Inconsistencies
These defects relate directly to the surface quality and visual appeal of the sample. They are often early indicators of poor control over raw material sourcing or inconsistent finishing processes. Catching these issues is a key part of any preventive quality management system, as they are much harder to correct during mass production.
- Bubbles, cracks, or uneven application in the paint or lacquer.
- Scratches, dents, or chips on PVC, wood, or sintered stone surfaces.
- Visible glue residue around joints or panel edges.
- Color variations that fail to match the approved Pantone or sample swatch.
Structural and Assembly Errors
This category covers problems with the vanity’s core construction, impacting its stability, alignment, and long-term durability. These errors almost always point to a deviation from the standardized operating procedures (SOPs) during the assembly phase, signaling a lack of process discipline on the factory floor.
- Misaligned cabinet doors or drawers, resulting in uneven gaps.
- Weak or improperly fastened joints that cause wobbling or instability.
- Dimensions that deviate from the technical specifications and drawings.
- Hardware, like handles or knobs, installed crookedly or with incorrect spacing.
Functional Component Failures
A functional check confirms that all moving parts and integrated technologies perform as designed. Failures here often trace back to either faulty third-party components or improper installation during the final production stages. This is where a supplier’s component sourcing and quality control are put to the test.
- Drawer slides that stick, grind, or do not properly engage the soft-close mechanism.
- Hinges that are loose, squeak, or prevent doors from closing flush against the cabinet frame.
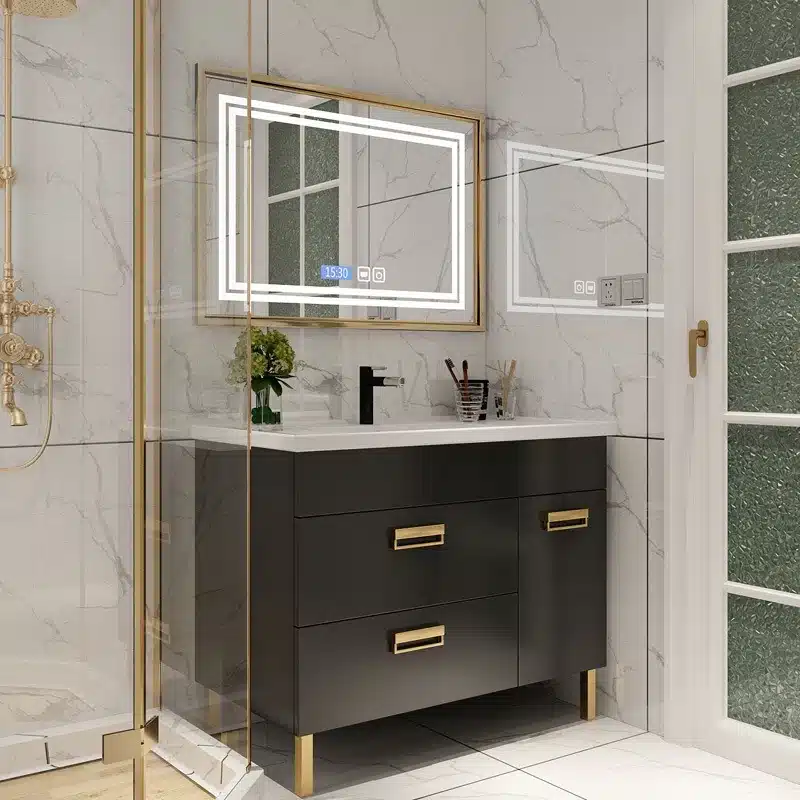
- Malfunctioning smart mirror features, like unresponsive touch buttons, flickering LEDs, or a non-working anti-fog function.
Signing the “Sealed Sample”: Why Is This Step Crucial?
Signing and sealing the final approved sample is a non-negotiable step that converts it into a legally binding quality standard, protecting your investment from production deviations and fraud.
After weeks of design refinement and prototyping, you finally have the perfect vanity sample. The color, construction, and hardware are exactly what you specified. But the process isn’t over. The final, crucial step is to formally approve this sample by signing and dating it, creating what is known in the industry as the “sealed sample” or “golden sample.” This simple action locks in your quality expectations and serves as the ultimate reference point for mass production.
Establishing a Verifiable Production Standard
Signing a sample transforms it from a prototype into an official, authenticated benchmark. This golden sample becomes the undeniable standard that our production team and your own inspectors will use to validate the quality of the final order. It removes all ambiguity about the agreed-upon specifications and creates a physical contract that holds everyone accountable.
- It creates a physical, dated reference to resolve any potential disputes about product quality or features.
- This process ensures all parties, from the factory floor to final inspectors, are aligned with the same approved specifications.
- The signed sample serves as the definitive guide for consistent mass production.
Preventing Unauthorized Substitution and Fraud
An unsigned sample is vulnerable. In unscrupulous factories, it can be swapped with a substandard version right before an inspection, leading to a fraudulent approval. The act of signing, dating, and sealing establishes a secure chain of custody. Any attempt to tamper with or replace the reference sample becomes immediately obvious, protecting your business from the classic “bait and switch.”
- Your signature and the date act as a security seal, protecting against unauthorized sample replacement.
- This step ensures the high-quality product you approve is the same one that gets manufactured in bulk.
- It protects your investment by eliminating the risk of a factory using one sample for approval and a different, lower-quality standard for production.
Frequently Asked Questions
How much does a custom vanity sample cost?
The cost for a custom vanity sample typically ranges from $300 to $1,500. The final price depends on factors like the complexity of the design, the specified materials (e.g., solid wood vs. MDF), the intricacy of the finish, and any custom hardware. Prototypes require dedicated tooling and manual processes, which contributes to a higher cost than a mass-produced unit.
How long does it take to make a prototype?
On average, producing a custom vanity prototype takes between 4 to 8 weeks after the technical drawings and all specifications have been finalized and approved. This lead time accounts for material sourcing, custom fabrication, finishing, assembly, and quality control checks before the sample is ready for shipment.
Should I ship the whole vanity or just a door?
This depends on your evaluation goal. For approving color, finish, and material texture, a door sample is sufficient and more cost-effective. However, to verify overall construction quality, hardware functionality, joint integrity, and assembly processes, a complete vanity prototype is essential.
What is a “Golden Sample” in manufacturing?
A “Golden Sample” is the final, approved benchmark product created using the intended mass-production processes and materials. It serves as the definitive quality standard that all stakeholders agree upon before full-scale manufacturing begins. Throughout production, units are compared against this golden sample to ensure consistency in dimensions, color, material, and function, preventing defects and quality fade.
How to check paint quality on a sample?
To properly assess paint quality, inspect the sample under bright, indirect light. Check for uniform color and sheen across all surfaces. Look for defects like orange peel (a bumpy texture), drips, sags, or trapped dust. A crucial step is to perform a cross-hatch adhesion test (ASTM D3359) with specialized tape to ensure the paint does not flake or peel, confirming it is properly bonded to the substrate.
Is sample cost refundable?
Yes, it is a standard industry practice for the sample cost to be credited back or deducted from your first mass-production order. This policy serves as a good-faith gesture that effectively makes the sample free for clients who proceed with a full-scale partnership. The exact terms for the refund are typically outlined in the formal quotation.
Conclusion
Inspecting a physical prototype is the only way to confirm that your custom vanity meets specifications before mass production. This step allows you to verify everything from color accuracy and construction durability to hardware functionality. The signed-off “Golden Sample” then serves as the binding quality benchmark for your entire order.
When you’re ready to bring your design to life, our team can help you develop a custom prototype. You can test our quality firsthand with a fully refundable sample order.
Frequently Asked Questions
How much does a custom vanity sample cost?
The cost for a custom vanity sample typically ranges from $300 to $1,500. The final price depends on factors like the complexity of the design, the specified materials (e.g., solid wood vs. MDF), the intricacy of the finish, and any custom hardware. Prototypes require dedicated tooling and manual processes, which contributes to a higher cost than a mass-produced unit.
How long does it take to make a prototype?
On average, producing a custom vanity prototype takes between 4 to 8 weeks after the technical drawings and all specifications have been finalized and approved. This lead time accounts for material sourcing, custom fabrication, finishing, assembly, and quality control checks before the sample is ready for shipment.
Should I ship the whole vanity or just a door?
This depends on your evaluation goal. For approving color, finish, and material texture, a door sample is sufficient and more cost-effective. However, to verify overall construction quality, hardware functionality, joint integrity, and assembly processes, a complete vanity prototype is essential.
What is a “Golden Sample” in manufacturing?
A “Golden Sample” is the final, approved benchmark product created using the intended mass-production processes and materials. It serves as the definitive quality standard that all stakeholders agree upon before full-scale manufacturing begins. Throughout production, units are compared against this golden sample to ensure consistency in dimensions, color, material, and function, preventing defects and quality fade.
How to check paint quality on a sample?
To properly assess paint quality, inspect the sample under bright, indirect light. Check for uniform color and sheen across all surfaces. Look for defects like orange peel (a bumpy texture), drips, sags, or trapped dust. A crucial step is to perform a cross-hatch adhesion test (ASTM D3359) with specialized tape to ensure the paint does not flake or peel, confirming it is properly bonded to the substrate.
Is sample cost refundable?
Yes, it is a standard industry practice for the sample cost to be credited back or deducted from your first mass-production order. This policy serves as a good-faith gesture that effectively makes the sample free for clients who proceed with a full-scale partnership. The exact terms for the refund are typically outlined in the formal quotation.




0 Comments