


Every vanity order carries dozens of dimensions, and the one that causes the most site arguments is usually the only one nobody wrote down: the countertop overhang, the reach of the top past the cabinet case. It sets front-edge comfort, the wall gap, the faucet geometry, and freight exposure, yet it leaves the factory as an unmarked default. This guide shows how to put that parameter on the drawing and verify it before cutting, using Main Focus Cabinet (MFBATH), a vanity and sintered stone top manufacturer in Changge, Henan, founded in 2015, as the running example.
MFBATH’s PVC, plywood, and solid wood cabinet boxes are built in recognizable bands, roughly 24 to 60 inches wide and 18 to 24 inches deep, but the top is cut from a larger slab with dimensions of its own. Sintered stone makes the separation obvious: a surface rated Mohs 7 to 8 and stable to 300 degrees C shrugs off daily wear, while the unsupported edge beyond the case behaves like a lever arm inside a container. Each section follows the order in which you will defend it: what the parameter controls, what each direction risks, how to write it down, how to prove it survived shipping. Samples turn in 10 working days and every unit passes a 5-point inspection, both of them verification tools rather than marketing lines.
Key Takeaways
- An unmarked overhang is not an empty gap. The factory fills it with a default, and the top you receive answers to nobody’s intention but yours.
- A front return buys deck area and costs knee room and impact exposure. A cantilevered edge fails from leverage at an unsupported corner, not surface wear, so reinforcement detail and signed sample must agree.
- Rear and side junctions need three named options, open joint, integral upstand, or scribed to the wall, and each requires the wall-measurement duty assigned in writing.
- A revised return invalidates every faucet dimension, so tie basin and spout centerlines to the top’s front edge and re-state them when it changes.
- Put at least five callouts on the drawing, confirm the reading with a measured sample, lock the revision in the proforma invoice, and record the unboxing.
Table of Contents
- What the Countertop Overhang Actually Controls
- Front Edge: Knee Clearance, Comfort and Impact Risk
- Side and Rear Returns, Splash Gaps and Wall Conditions
- How Overhang Interacts With Basin and Spout Layout
- Writing the Overhang Into the Fabrication Drawing
- Unsupported Edges: Packaging, Damage and Tolerance Checks
- Frequently Asked Questions
- The Bottom Line
What the Countertop Overhang Actually Controls
Overhang is the horizontal distance from a reference face of the cabinet case to the matching edge of the top, and the trade splits that one word into three decisions. The front return, sometimes called the front apron when the slab turns down at the face, is the reach past the front of the case. Side returns are the reaches past each side panel. The rear splash is the wall treatment, either a formed upstand of the same material or a flat back edge meeting the wall with a joint.
Ordering behavior hides the issue. The PVC, plywood, and solid wood lines come in narrow bands, roughly 24 to 60 inches wide and 18 to 24 inches deep, which makes the top feel like part of the box. It is not: tops are cut from a larger slab and carried as their own line item. A countertop is defined broadly enough to cover both, so nothing in the product name fixes the relationship between a standardized case and a separately cut surface. It exists only when someone writes it down, which is why our page on standard vanity cabinet depths stops at the case.
Responsibility is the uncomfortable part. Designers own the reveal and should normally set the projection, especially in a vanity room where the top reads as a horizontal band. Factories own what is buildable, meaning support behind the edge, reinforcement, and packing. Importers and general contractors own neither, and they are the only party who reads the drawing and the invoice, so the decision lands with them. When all three assume someone else decided, the top ships to a default and the site discovers the specification.
What Goes Wrong When It Stays Implicit
The site failures are repetitive enough to list. A top flush with the face frame removes the shadow line the designer drew, and nothing short of a new slab fixes it. A deep front return gives knee contact to anyone who sits on the case to shave, and the crew answers by pulling the cabinet away from the wall, which opens the rear joint. A rear edge that stops short of the tile flange leaves a gap closed with caulk, a maintenance item from the day it is tooled. None of the three is a manufacturing defect, which is why they are so expensive to argue about.
Front Edge: Knee Clearance, Comfort and Impact Risk
Construction type decides what the front edge does all day. In MFBATH’s sintered stone line, floating units are built in the 600 to 1800 mm range and floor-standing units in the 800 to 2000 mm range, and the two support a top in different places. A floor-standing case carries the front of the top down through the carcase to a toe-kick line at the floor, so a projecting edge sits above structure. A wall-hung case carries the top only at the box and the wall, leaving the front edge exposed at knee height with nothing beneath it.
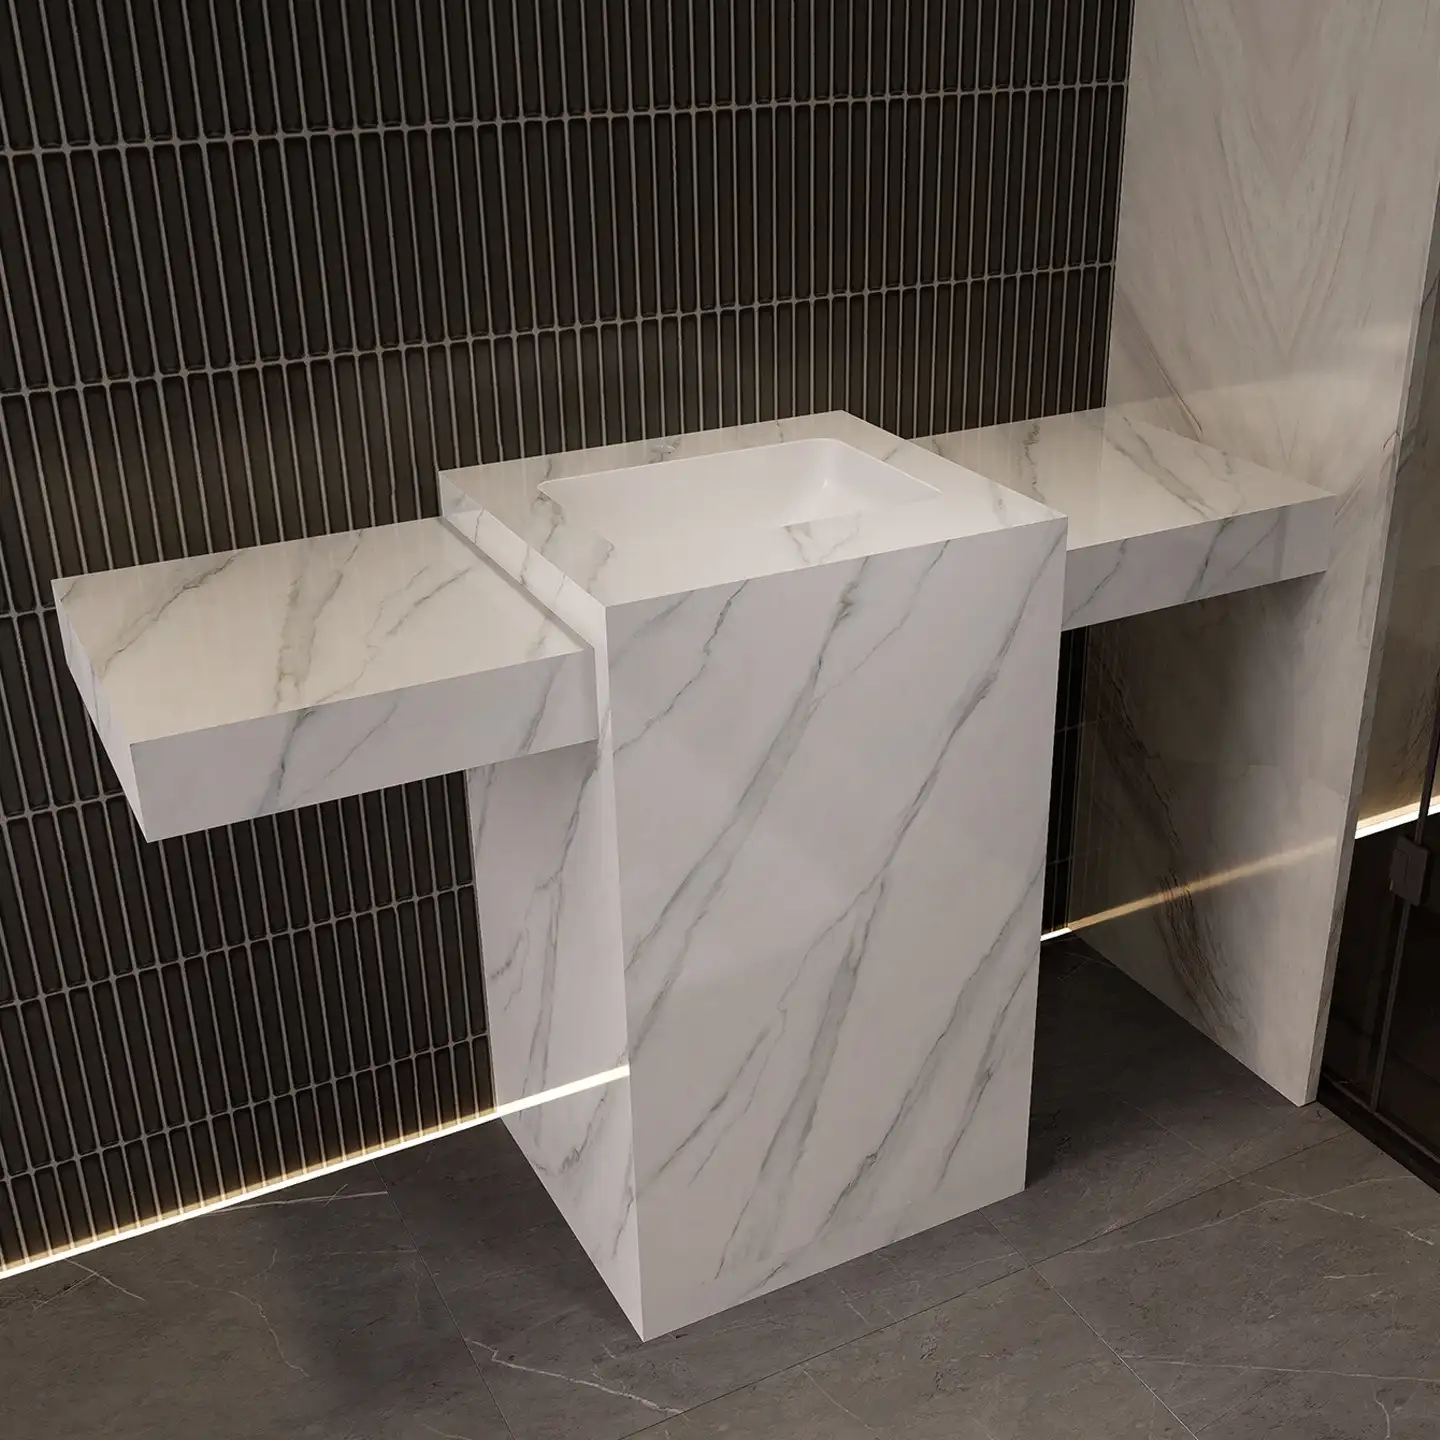
The comfort trade is a relationship rather than a figure. Move the front edge forward and you buy usable deck: drying area, room for a glass, a place for a wrist to rest while washing. Move it forward and you also increase thigh-to-case interference for anyone seated on the cabinet front, and you lengthen the leading edge that legs, luggage, and toy cars meet. The interaction runs through mounting height rather than through the return alone, so decide the two in one conversation; our guide to how vanity height and countertop specs interact sets out that pairing.
Material shifts the failure mode instead of removing it. A sintered surface at Mohs 7 to 8 resists scratching, and a 300 degrees Celsius heat rating keeps hot styling tools off the usual failure list, so wear is rarely the argument. Edge chipping is the argument, and chipping follows impact angle and the support behind the edge rather than surface hardness. A square edge concentrates an impact at a corner; an eased or rounded profile distributes it. Children meet the edge at shin and forehead height and hotel corridors meet it with carts and luggage, so edge form is a durability decision. Ask which profiles that slab line can hold and what corner reinforcement comes with each, and record the answer in drawing notes.
Where a project references accessibility standards, the unit should be designed to meet them, and a projecting top edge belongs in that review: cantilever projection, mounting height, knee clearance, and reach ranges are read from the shop drawing, not from a catalog page. Wall-hung units with a generous front return are the usual trap, because the leading edge is what a cane finds first. Check the code edition your jurisdiction adopts, and make the drawing state those dimensions from a fixed datum.
Side and Rear Returns, Splash Gaps and Wall Conditions
The rear junction forces the choice out loud, and three answers are legitimate. An open joint, where the top runs to the wall and the gap is closed on site. An integral upstand, a return formed from the same slab that stands up behind the top and leaves no exposed cut edge. A scribed fit, where the back edge is shaped to follow the wall so the joint stays narrow as the wall wanders. Each is buildable, and each fails in a different way.
The open joint is the easiest to fabricate and the hardest to live with. The risk is not the visible line but what happens behind it. Stagnant moisture behind an unsealed gap has nowhere to dry, and that is the condition mold growth needs, which makes a wet-wall joint a service item rather than a cosmetic one. Sealant belongs in the specification too: silicone is normal in wet zones because it stays water-resistant and flexible, neutral-cure chemistry is chosen where a mirror coating is sensitive to acid, and antifouling additives fade with age.
An upstand answers the water question and raises the geometry question, because it bears along its full length only where the wall is flat and plumb. Tiled walls are crowned at corners, bowed at a tub flange, and out of plumb above the rough-in. An upstand built to nominal dimensions touches at two points and shows a light line between them, and the crew closes that line with caulk. So the drawing states the upstand and the order states the wall flatness it assumes.
Scribing gives the closest fit and the most contested duty, because the shaping happens on site. A factory cutting to a flat-plate drawing knows nothing about your walls, and a top cut to field measurements cannot be replaced quickly. The order language that prevents the argument is short: field measurements taken by the contractor against the revision dated in the same paragraph, the top fabricated to those measurements, on-site trimming performed and charged by the contractor, and no dimensional claim accepted against the factory for wall conditions.
Side returns attract less attention and generate their own gaps. A vanity butted against a tub apron or a narrow partition depends on the side return as a splash barrier, and a short return leaves a shelf where water sits against the panel.
How Overhang Interacts With Basin and Spout Layout
Overhang changes the geometry of washing, not merely the look of the cabinet. Every faucet dimension is measured from something, and the front edge of the top is the only stable reference. Revise the return and those dimensions move with it, including spout to basin center, the splash radius, and the deck where water dries. This is the trap that produces the most rework, a return revised late in submittal and a faucet centerline never re-stated.
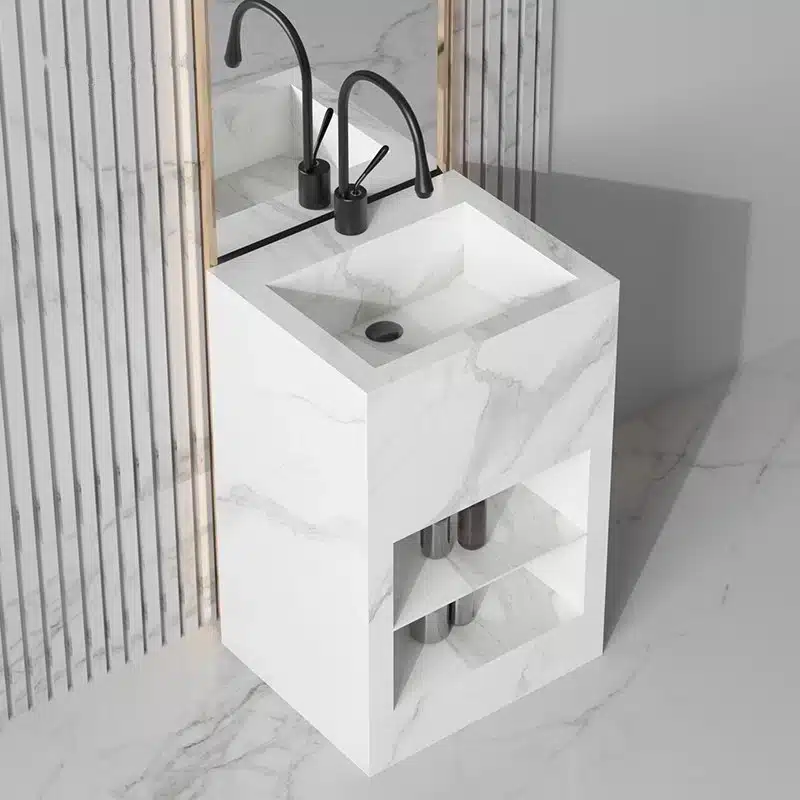
The three basin arrangements ask for opposite things of the front edge. MFBATH presses sintered stone basins from 600 to 2000 mm wide, and its sintered stone bathroom vanities pair those bowls with tops cut to the same drawing, which is why the two should be ordered as one dimensioned assembly. A vessel bowl sits on the deck and consumes depth on the user’s side; an undermount bowl sits below it and puts the working surface forward of the rim; an integrated bowl is fixed in the pressing, so the return is the only variable left. Our comparison of an integrated basin versus a separate countertop covers replacement logic; the table covers the drawing.
| Basin arrangement | Front-edge direction | Installation focus | Confirm on the drawing |
|---|---|---|---|
| Vessel bowl on top | A wider return preserves dry deck forward of the bowl; a tight return pushes splash toward the floor. | Faucet height and reach relative to the rim, overflow and drain access, clearance for mirror and lighting. | Bowl and faucet centerlines from the top’s front edge, plus hole set and spacing. |
| Undermount bowl, separate top | A longer return enlarges the working deck in front of the rim and the area that has to dry. | Cutout position and set-back from the front edge, rim support and clipping layout, hardware access. | Cutout centerline and set-back from the front edge, plus the reinforcement method. |
| Integrated sintered basin | The return is the only way to move a front edge relative to a bowl that is already fixed. | Drilling envelope for faucet and pop-up, handling at the pressed rim, no field cutting where avoidable. | Bowl center to the top’s front edge, hole positions, and the stated drilling envelope. |
Two habits prevent the rest of the argument. Dimension the spout from the front edge of the top, never from the front of the case, because the case reference is meaningless once the return changes. Re-issue the whole sheet after a revision instead of sending one changed number in a message. Field drilling of a sintered slab is possible with correct tooling, but the safe slab arrives with the holes where the signed drawing put them.
Source Vanity Tops Detailed to Your Drawing
Browse this product, solution, or service page to explore relevant offerings.
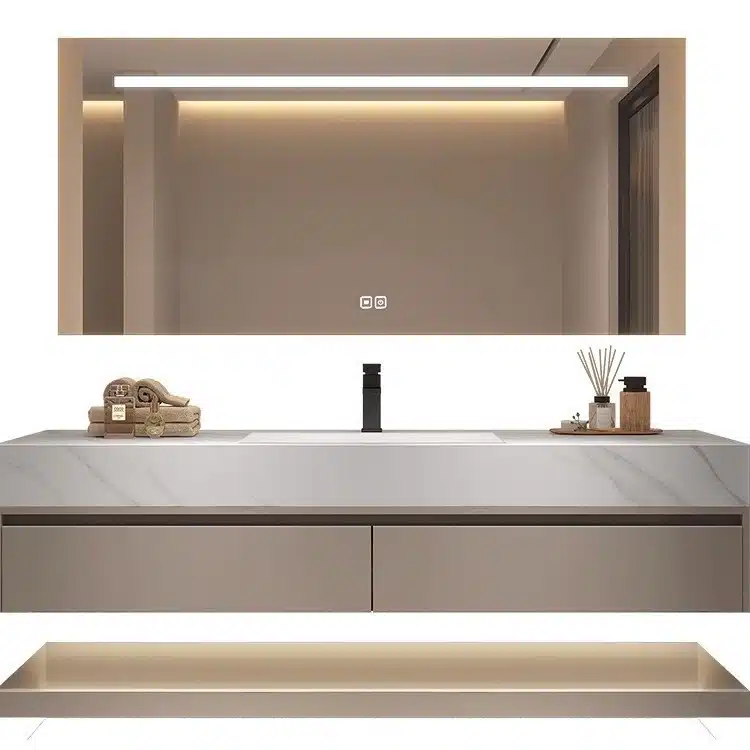
Writing the Overhang Into the Fabrication Drawing
A shop drawing a fabricator can cut from without questions carries at least five callouts about the top. First, the three returns: front return from the cabinet front face, each side return from the cabinet side face, and the rear treatment stated separately from top depth, so nobody infers whether the depth includes an upstand. Second, the basin centerline and the faucet hole set, both dimensioned from the top’s front edge. Third, the edge form, named as square, eased, or rounded, with corner treatment and reinforcement noted. Fourth, the cutout and its reinforcement: support frame or rails, bracket spacing, adhesive or mechanical fixing, and who supplies each. Fifth, the wall junction, with the assumed joint width and the sealant type. Add a drawing number, a revision letter, and a date to every sheet.
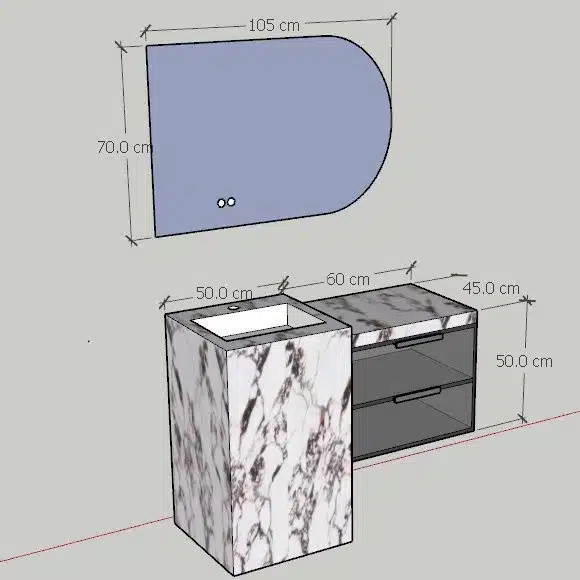
Then use the sample for what it is worth. Free sample support with a 10-working-day turnaround is not a courtesy; it is a test of whether the drawing survives translation. Measure the sample against the callouts you wrote, have the factory measure it too, and compare numbers rather than photographs. A callout that cannot be measured on a physical part is written badly, and the edge profile should be confirmed as one the fabricator can hold.
Change control is the step most often skipped. Mixed-container loading is ordinary practice, and the MOQ (minimum order quantity) at MFBATH is 15 sets per model, color, and size, so one lot can cover several jobs and several wall conditions at once. Lock the revision to the lot: every unit in it is built to a named drawing revision, and any change after sample approval restarts the clock and may require a new drawing, a new sample, and a new packing specification. A mid-production change accepted without paperwork splits the lot, a maintenance problem for the life of the project.
Put the authority in the proforma invoice (PI) in plain words: goods supplied to the signed drawing identified by number and revision, that drawing being the sole dimensional authority for the top, with measured callouts listed as acceptance criteria and the packing specification attached against the same revision. Money mechanics sit in the same sentence: the 30 percent deposit and the balance due within one week of the draft bill of lading (draft BL) on MFBATH’s free on board (FOB) Qingdao terms. Before anything is cut, confirm that the PI, the approved sample, and the packing spec name one revision.
Unsupported Edges: Packaging, Damage and Tolerance Checks
A cantilever is a lever arm, and a container is the environment that tests lever arms: the projecting edge and its two corners meet every rack, shift, and restow between ports. The return you chose for comfort also chose the transit risk, so packing gets reviewed with the drawing in hand rather than accepted as a standard carton.
Ask for protection in terms a packer can execute: corner guards on both corners of the projecting edge, a cushion or spacer on the cantilever side so the overhang never becomes part of the load path, banding kept off the finished edge, and clear marking of which side projects. Group long-return tops separately from tight-return units, because identical cartons hiding different internal geometry is how a good packing plan fails.
Align receiving with the factory’s own quality language. Every MFBATH unit passes a 5-point inspection, and the pre-shipment inspection (PSI) report should name the drawing number it checked against. Read that report before loading is authorized and look for two entries: top width and depth against the drawing, and the return recorded at center and at each corner.
Unboxing Record Before Sign-Off
Damage attribution is a documentary exercise finished inside the notification window your contract sets. Under a 2-year whole-cabinet warranty and a return rate below 1 percent, a factory has the incentive to honor a real claim; what it cannot honor is a claim with no record of when the chip was first seen. Run the same sequence on every container, with two people, one holding the camera and one reading labels.
- Photograph the container seal and a doors-intact view before anything is unloaded, then photograph dunnage and stacking as found.
- Before removing wrapping, photograph each unit’s labels so serial, model, and drawing revision sit in one frame.
- For each unit take four views: the unit squared to the camera, the front edge under raking light, each leading corner close, and the rear edge that meets the wall.
- Give every chip a close photo with a scale object in frame, a second photo locating it against the corner, and the unit serial.
- Log findings by unit serial rather than by model, and send the file inside the notification window in the contract.
Set the top on a flat floor and measure the diagonals, because a top that rocks will be blamed on the cabinet. Then read the returns against the drawing at center and at both corners, recording what you measured rather than whether it looks right. A return short at one corner is a squareness problem, short at every corner is a fabrication problem, and correct everywhere but unable to meet the wall is a building problem.
Frequently Asked Questions
Who decides the overhang, the designer or the factory?
The designer or specifier should set it, because it is a visual and ergonomic decision, and the factory should confirm that what was chosen can be supported, reinforced, and packed. Put the decision in the submittal package with a drawing number, a revision, and a signature, and treat an unmarked top drawing as an incomplete submission rather than as agreement.
How far can a sintered stone top cantilever?
There is no single figure to publish, because the limit depends on slab thickness and format, the support under the projecting area, the edge and corner detail, and whether the unit is wall-hung or floor-standing. Ask the fabricator for a written answer against your drawing, including the reinforcement it requires, then verify it on a physical sample before production. A number with no support detail is a guess; a build-up offered for approval is engineering.
What is the safest way to handle the rear splash and the wall gap?
Choose deliberately among three options: an open joint closed on site with sealant, an integral upstand formed from the same slab, or a scribed back edge shaped to the wall. The open joint is quickest to build but traps stagnant moisture behind an unsealed gap and becomes a maintenance item. The upstand closes only on a flat, plumb wall. The scribed fit handles real walls but moves cutting duty onto the site crew. Whichever you pick, name who measures the walls and who tools the joint.
What should I do if an edge is chipped when the container arrives?
Document before you assemble: seal and dunnage photographs, wrapping-on labels, four views per unit, a scaled close photo of each chip, and a log keyed to unit serials. Notify the factory inside the window your contract sets, citing the drawing revision and the pre-shipment inspection report. That record lets a 2-year whole-cabinet warranty be assessed as a fabrication matter instead of argued as freight damage.
The Bottom Line
Put the overhang on the drawing as a value with a datum, a revision, and a signature, and decide each edge on purpose: front return for deck and comfort, rear and side treatment for the wall you actually have, basin geometry for the faucet layout. Then verify it three times, on a measured sample, in the proforma invoice, and in a recorded unboxing. The deeper tolerance detail sits in our installation and tech-spec guides.





0 Comments