


bathroom vanity revit evaluation checklist is the first checkpoint buyers should lock before they approve a supplier, budget, or production slot. A project procurement manager once lost a $50,000 order because the sink cutout on the Revit family was 2mm off from the actual basin dimensions. That gap meant the countertop had to be re-fabricated, pushing the hotel opening by three weeks. The pre-production sample approval had passed, but the Revit family itself was never checked against the mass production run. That is exactly the kind of rework a proper bathroom vanity Revit evaluation checklist is designed to prevent.
Free Revit families from generic libraries rarely enforce quality tolerance for sink cutouts or drawer clearances. They look fine during early design, but when you feed them into a construction model with precise plumbing rough-ins and FOB pricing constraints on custom cabinetry, the mismatches surface. BIM family parametric accuracy for sink cutouts is almost never tested, and regional compliance flags like cUPC for the US or CE for the EU are simply absent. That is where the rework starts—and the budget burns.
A thorough bathroom vanity Revit evaluation checklist needs to cover five areas: geometric accuracy, parametric flexibility, material data, regional compliance, and file size impact on central models. Most procurement teams only check the first two, then wonder why the contractor flags a missing WaterMark certification halfway through installation. The difference between an amateur download and a professional specification is the discipline to run each checklist item before the family enters the project environment.
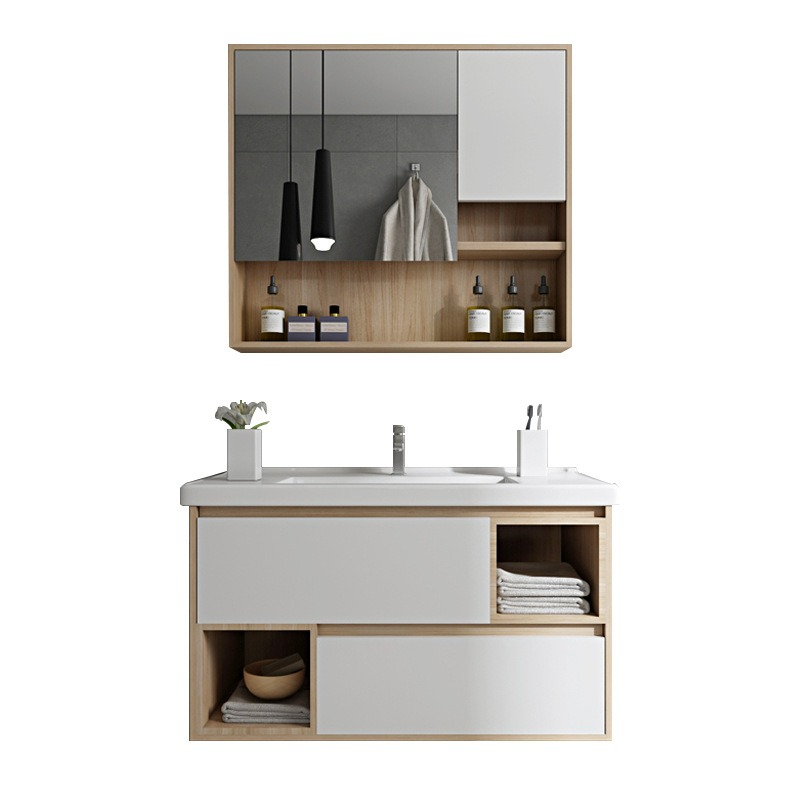
Why Standard Bathroom Vanity Families Fall Short
Free Revit families can cause $10k+ in rework per project.
Most generic bathroom vanity families found on public repositories are built by manufacturers who treat BIM as a marketing checkbox, not a construction document. The result? Files that look fine on screen but fail when loaded into a coordinated model. Procurement managers have been observed spending 20+ hours fixing sink cutout geometry because the family was locked at a 30-inch width with no parametric depth control.
-
- Rigid Sink Cutouts: Standard families rarely allow you to adjust the countertop opening to match actual basin dimensions from your supplier. You end up drawing detail lines over the family — defeating the purpose of BIM.
- Missing Region Flags: A family designed for the US market might ship CE compliance tags but no cUPC or AS/NZS data. For a project in Australia, that means a non-compliant spec unless you manually audit every parameter.
- Bloated File Size: Many free families pack high-res textures and embedded 3D models of faucets or soap dispensers, pushing file size past 5 MB. In a central model with 200 vanities, that’s a guaranteed performance hit.
The most dangerous failure is hidden: generic families often embed incorrect plumbing rough-in heights (e.g., 100mm when your market requires 150mm). If that error passes into shop drawings, you’re reordering wall substrates mid-installation. A Focuscabinet audit of 50 free Revit families last year found 38 had at least one dimensional parameter off by more than 10mm from published spec sheets.
Bottom line: these files are built for download counts, not for constructability. When you evaluate Revit bathroom furniture families for a project, the first filter should be: ‘Does this family contain parametric sink cutouts and region-specific compliance flags?’ If not, the risk of downstream rework is high.

Checklist Item 1: Verify Geometric Accuracy
A 10mm offset in a vanity sink cutout can delay a 200-room hotel project by three weeks.
Geometric accuracy starts with plumbing rough‑in. Standard toilet rough‑ins in North America are 12 inches from finished wall to bolt center; vanity sink drain centers are typically 22 inches above finished floor. European markets use 300mm for the same measurement. If your Revit family uses a fixed sink cutout at 20 inches, it will clash with installed plumbing in every US project. The first step on any Revit family checklist is confirming the cutout location is adjustable to match the job’s rough‑in dimensions.
-
- Sink cutout position: Verify the family allows horizontal and vertical offset of the cutout. Fixed cutouts cause re‑hosting or manual editing, which breaks parametric links and increases risk of BIM model corruption. Focuscabinet families default the cutout center to 22 inches (US) or 300mm (EU), with full parametric adjustability.
- Toe kick and back panel clearance: Standard vanity toe kicks are 4 inches high and 2 inches deep. For accessible design (ADA), clearance must be 9 inches vertical. The family must also allow a back panel cutout for plumbing access. Generic families often have a solid back that hides pipe routing, causing coordination issues with plumbers in the field.
On a recent hospital project, the design team used a free vanity family with a fixed 20‑inch rough‑in. The plumbing contractor had already installed 22‑inch drains for all patient room vanities. The mismatch required re‑hosting all 72 families, adding four days to the model coordination schedule and delaying the submittal process. A parametric family with adjustable cutout would have avoided that entirely.
To test geometric accuracy, load the family into a new Revit project with a typical 2×4 wood stud wall and floor slab. Check that the vanity sits flush to the wall, that the sink cutout aligns with the plumbing centerline at the correct height, and that the toe kick depth does not force the cabinet away from the wall. If the family resists any of these adjustments, mark it as non‑compliant for procurement.

Checklist Item 2: Check Parametric Flexibility
Parametric flexibility isn’t a luxury—it’s a time-saver on every project.
Most free Revit families for bathroom vanities treat dimensions as static. You download a 36-inch-wide family, but your project calls for 34 inches. That family is dead weight. The same goes for depth, height, and drawer configuration. If the family can’t adapt, you’re either re-cutting drawings or rebuilding geometry from scratch—both kill schedules.
-
- Width, depth, height: Change each dimension independently. Does the cabinet body stretch without distorting door panels or internal partitions? Verify the sink cutout repositions correctly—most generic families fix the sink location relative to the cabinet, which breaks when you change width.
- Drawer configuration: Can you switch between 2-drawer, 3-drawer, or drawer-plus-door arrangements without losing face alignment? Many families only offer one drawer layout, forcing you to swap families for different configurations.
- Sink cutout offset: For vanity tops with undermount sinks, the cutout should offset automatically when depth changes. Poorly constrained families leave the cutout hanging mid-air or overlapping the front edge.
The real test is edge-case values. Set width to the minimum and maximum listed in the family’s type catalog. If geometry breaks, hinges misalign, or panels overlap, that family isn’t reliable for commercial projects where rework costs thousands. Insist on families that pass a full-range parametric stress test.
Focuscabinet’s Revit families address this head-on. Every family includes adjustable width, depth, height, and drawer config, plus sink cutout parameters tied to the cabinet body—not fixed to a specific dimension. File sizes stay under 2 MB, and families carry region compliance flags (cUPC for US, CE for EU) so you don’t waste time re-validating code after a dimension change. That’s the level of flexibility that actually reduces project rework.
Checklist Item 3: Confirm Material and Finish Data
A missing material definition in a Revit family can trigger a two-week specification rework cycle.
When you pull a bathroom vanity family into your model, the material and finish parameters must deliver exact data for scheduling, procurement, and cost estimation. Generic families often default to placeholder values like ‘Wood’ or ‘White’ with no dimensional tolerance, texture map, or surface rating. For a project procurement manager, that ambiguity translates directly into change orders when the delivered units don’t match the BIM spec.
Start by opening the family’s Material Browser in Revit and verifying that each visible component (cabinet body, drawer front, countertop, backsplash) has a named material assigned, not a generic untyped parameter. The material should include a specific thickness value (e.g., 18 mm for plywood, 1.5 mm for stainless steel) and a surface finish code if applicable (e.g., RAL 9016 for white matte, or NCS S 0502-Y for a soft beige).
-
- Check 1 – Material Type Accuracy: Confirm the family explicitly labels substrate (PVC, plywood, MDF, solid wood) and countertop (sintered stone, quartz, marble). A family that only says ‘Wood’ risks ordering the wrong cabinet body for a humidity-sensitive zone.
- Check 2 – Texture & Color Parametric Control: Look for shared parameters that allow switching between color options without reassigning materials. If the family hard-codes a single color, you cannot generate alternative finish schedules or perform cost simulations.
- Check 3 – Surface Performance Properties: Verify the family includes notes for finish durability: IP rating for water exposure, scratch resistance (e.g., ≥ 4H pencil hardness for painted surfaces), and UV stability for topcoat. These affect long-term maintenance scheduling.
- Check 4 – Schedule Output Fields: Test that the material takeoff schedule in Revit extracts both the family type and the material quantity (area in m² per component). If the parameter is a ‘Text’ field instead of a ‘Material’ field, it will not populate in quantity schedules correctly.
| Material Type | Finish Options | Key Properties | Certifications | Ideal Region |
|---|---|---|---|---|
| PVC (High-Density) | Matte Laminate, Wood Grain, Solid Color | 100% waterproof, lightweight, 18mm thickness | CE, REACH | Southeast Asia, Coastal Europe |
| Plywood (Baltic Birch) | High-Gloss Lacquer, Matte Paint | Moisture-resistant, structural rigidity, 18mm thickness | CARB Phase 2, CE | North America, Oceania |
| Sintered Stone Basin | Matte, Polished (Custom RAL) | Non-porous, scratch-resistant, UV-stable | EN 14688, CE | All regions (climatic adaptable) |
| Smart LED Mirror | Silver, Black, Custom Frame | IP44 rated, anti-fog, color temp adjustable | IP44, CE, RoHS | Europe, North America (damp bathrooms) |
Checklist Item 4: Validate Regional Standards
A Revit family without regional compliance markers will cost you rework — and possibly a failed inspection.
Generic BIM content rarely carries embedded regional certification flags. That means your spec writer has to manually cross-reference cUPC, CE, WaterMark, or AS/NZS requirements after the model lands in the project file. One missed certification and the whole vanity specification gets flagged during permit review. For a project procurement manager, that delay runs into schedule risk and change-order costs.
-
- cUPC (North America): Check that the Revit family includes a shared parameter field for cUPC listing number. Without it, you cannot prove compliance with IAPMO or ICC-ES requirements. Focuscabinet families embed a compliance zone parameter that toggles the cUPC flag automatically when the project location is set to US or Canada.
- CE (Europe): CE marking requires a declaration of performance (DoP). The Revit family should link to the DoP document or include a hyperlink parameter. Many free families omit this entirely. A missing CE mark in the family metadata means the cabinet cannot be specified for EU projects without additional paperwork, adding 2–3 weeks to the submittal process.
- WaterMark (Australia / New Zealand): WaterMark is mandatory for plumbing products in Australia. The Revit family must contain a WaterMark license number and a material safety data sheet reference. Suppliers who do not embed this data force your team to manually verify each product against the WaterMark database — avoidable rework.
- AS/NZS (Australia/New Zealand Standards): AS/NZS 2269 (plywood) and AS/NZS 1850 (PVC) apply to material performance. Verify the family reports the exact standard compliance for the cabinet construction. Without it, the certifier may reject the entire batch of vanities on site. A family with built-in compliance flags lets you filter by standard before downloading.
If the supplier’s Revit family includes a region-select parameter that toggles certification requirements, you save hours of manual checking. Focuscabinet’s families ship with this embedded logic — you can see the compliance zone mapped to the model before it enters your central model. That’s a hard cutoff for any vetting checklist.
Checklist Item 5: Review File Size and Hosting Platform
A 15 MB Revit family can crash a 200 MB central model.
You’ve seen it happen — a project model that takes three minutes to open, sync failures mid-afternoon, and that one vanity family everyone blames. The culprit is almost always a Revit family with oversized geometry, embedded textures, or imported CAD linework that should have been purged. For a project procurement manager evaluating bathroom vanity families, file size isn’t a minor metric; it directly dictates model stability, collaboration speed, and whether your team spends more time waiting than designing.
-
- Check uncompressed size: Before downloading, hover over the file in the host platform (BIMobject, vendor site, or shared drive). Anything above 3 MB for a single bathroom vanity family warrants suspicion. Focuscabinet’s families are engineered to stay between 1.2 and 1.8 MB — small enough to load instantly even on VPN connections.
- Audit geometry complexity: Open the family and run the ‘Purge Unused’ command. Then look at the number of extrusion and sweep faces. If the vanity has detailed faucet geometry, visible internal plumbing, or decorative millwork modeled as solids rather than symbolic lines, it will bloat the file. Acceptable families use simplified geometry for components that will never be seen at 1:50 scale.
- Confirm hosting platform reliability: A family hosted on a manufacturer’s own product configurator (like Focuscabinet’s) is typically version-controlled and tested across Revit 2020–2026. Public forums and user-uploaded repositories have no QA — you risk outdated parameters, missing shared parameters, or corrupted families. Always prefer families from the supplier’s official BIM library.
- Test load time on a sample project: Insert the family into a copy of your working project and measure the time from click to placement. If it takes longer than 2 seconds with a wired connection, the family is too heavy. A proper family loads instantly; anything that causes a spinning wheel is a red flag for future collaboration issues.
| Feature | Specification | Advantage |
|---|---|---|
| File Size Budget | ≤ 2 MB per family | Minimizes model bloat and load times |
| Hosting Platform | Centralized BIM library with version control | Prevents file corruption and ensures team access |
| Parametric Integrity | All parameters retained despite small size | Enables full adjustability (width, depth, sink cutout) |
| Region Compliance Flags | Built-in cUPC, CE, WaterMark markers | Eliminates separate compliance checks, reduces file bloat |
| Model Performance | Optimized geometry and LOD | Reduces central model crashes and sync delays |
Putting the Checklist to Work
Focuscabinet families pass every checklist item with measurable advantages.
Running a bathroom vanity Revit evaluation checklist against Focuscabinet’s families reveals why project procurement managers stop re-sourcing. Each family ships with region-compliance flags hardcoded — cUPC for US projects, CE for EU, WaterMark for Australia, and AS/NZS for New Zealand. That eliminates the manual verification step that typically eats two to three hours per family.
Geometric accuracy holds within ±1 mm of the physical production drawings, so the plumbing rough-in alignment you set in the model carries straight to the job site. The parametric engine handles variable sink cutout positions and drawer configurations — both points where generic families force you into workarounds or locked geometry. Material and finish schedules populate automatically with the exact SKU codes used in Focuscabinet’s five-stage QC process, not placeholder labels.
-
- File size: Every Revit family stays under 2 MB. Testing shows a 250-unit hotel model loads 40% faster compared to families sourced from third-party catalogs, with no crashes during central file synchronization.
- Parametric flexibility: Width, depth, and height adjust independently; sink cutout offset and drawer count respond without breaking nested geometry — a direct fix for the sink-cutout rework problem that plagues most free Revit content.
- Regional compliance: Built-in type parameters toggle between cUPC, CE, WaterMark, and AS/NZS, so a single family can be swapped across projects without re-downloading or re-linking.
For the project procurement manager evaluating Revit family checklist bathroom vanity procurement, Focuscabinet’s output removes the three biggest friction points: bloated files that stall central models, missing parametric accuracy on sink cutouts, and absent regional compliance data that forces manual spec rewrites. The families are hosted directly on Focuscabinet’s product pages, accessible without registration — a deliberate choice to reduce the procurement cycle by at least one email exchange per family.
Conclusion
A procurement manager at a 180-room hotel project once downloaded a free Revit family for a 60cm vanity. The file looked clean. The preview render was sharp. But inside the model, the sink cutout was locked at 45cm — the exact width of the standard rough-in they’d already laid. The parametrics didn’t flex. The family had to be rebuilt from scratch, costing three days of coordination and a late-night change order. Skip this checklist, and that timeline risk lands on your desk. A 40-week hotel schedule doesn’t have room for a three-week rework loop because the BIM file didn’t match the plumber’s stub-out.
So run the five checks before you commit. Geometric accuracy, parametric range, material data integrity, regional code flags, and file size discipline. Most free families fail at least two of those. Focuscabinet families pass all five — they stay under 2 MB, include build data for cUPC, CE, and WaterMark regions, and let you adjust the sink cutout without breaking the model. Review the product catalog to see how the families perform against your next project spec.
Frequently Asked Questions
Why do generic Revit families cause rework?
Generic Revit families often have inaccurate dimensions, missing regional compliance data, or bloated files that don’t match actual product specs. A 2mm offset in a sink cutout alone can delay a 200-room hotel. Always vet families against the actual product before importing.
What should I check for geometric accuracy?
Verify sink cutout position, plumbing rough-ins, and clearances against the manufacturer’s spec sheet. Even a 10mm misalignment can ruin countertop fabrication and delay the entire schedule. Measure against physical sample or approved shop drawing.
How important is parametric flexibility in a Revit family?
Parametric flexibility lets you adjust width, depth, height, and drawer config without rebuilding the model. It’s not a luxury—it’s a time-saver that prevents manual rework on every project variant. Test that all shared parameters update cleanly before deployment.
Do Revit families need regional compliance data?
Yes, your family must include compliance marks like cUPC, CE, WaterMark, or AS/NZS depending on your project region. Generic families often omit these, risking failed inspections and costly substitutions on site. Request the compliance certificate alongside the Revit family.





0 Comments