

 A detailed vanity sizing and layout guide is the only barrier between a smooth installation and a costly project rework. One small miscalculation in dimensions means the unit won’t fit the alcove, plumbing rough-ins will be off, or accessibility codes are violated, triggering change orders that destroy a project’s profitability.
This guide establishes a standard operating procedure for vanity specification. We will cover the core dimensions for width, depth, and height before detailing the critical installation mechanics. This includes proper use of filler strips for alcove gaps, accounting for door swing and drawer clearances, and proportionally sizing mirrors and lighting fixtures.
Understanding Standard Vanity Widths (24″-72″)
The industry has standardized vanity widths between 24 and 72 inches to streamline manufacturing, simplify bathroom layout planning, and ensure compatibility with common sink and countertop sizes.
Single-Sink Vanities (24″ to 48″)
Vanities in the 24 to 48-inch range are the industry default for single-user bathrooms, guest baths, and powder rooms. This sizing provides a functional balance between the sink, counter space, and storage without overwhelming smaller floor plans. A 24-inch model is a compact solution for tight spaces, offering just the essentials. The most common sizes fall between 30 and 36 inches, as this range provides adequate counter space next to the sink for daily items. At the upper end, a 48-inch vanity delivers a much more generous single-sink layout, often configured with extensive counter space or multiple drawer banks.
Double-Sink Vanities (60″ to 72″)
Widths of 60 to 72 inches are engineered to accommodate two sinks, making them the standard for master bathrooms and shared family bathrooms. This setup allows two people to use the space at once, improving efficiency during peak morning hours. A 60-inch model is the entry-level size for a double vanity, fitting two sinks with minimal counter space between them. The 72-inch width is a far more popular choice for master suites, as it offers significant personal counter space for each user and supports more extensive storage configurations. These larger sizes help create a more spacious, premium feel in the bathroom.
| Configuration | Standard Industry Widths (Imperial) | FocusCabinet Production Widths (Metric) |
|---|---|---|
| Single Sink | 24″, 30″, 36″, 48″ | 60cm, 70cm, 80cm, 90cm, 100cm, 110cm, 120cm |
| Double Sink | 60″, 72″ | 120cm, 140cm, 150cm, 160cm, 180cm, 200cm |
Benefits of Standardized Sizing
Adhering to standard widths provides practical advantages for manufacturing, logistics, and design. This consistency simplifies the entire supply chain and ensures a predictable outcome for the end user. It allows factories to optimize production lines for efficiency and quality control. For designers and builders, standard dimensions make it easy to create functional and predictable bathroom layouts. Most importantly, it guarantees that off-the-shelf sinks, countertops, and mirrors will fit the chosen vanity correctly, reducing the risk of measurement errors and installation delays.
Depth Dynamics: Standard (21″) vs. Narrow (18″)
Choosing between a standard 21-inch and a narrow 18-inch vanity depth is a direct trade-off between maximizing countertop utility and preserving valuable floor space for traffic flow.
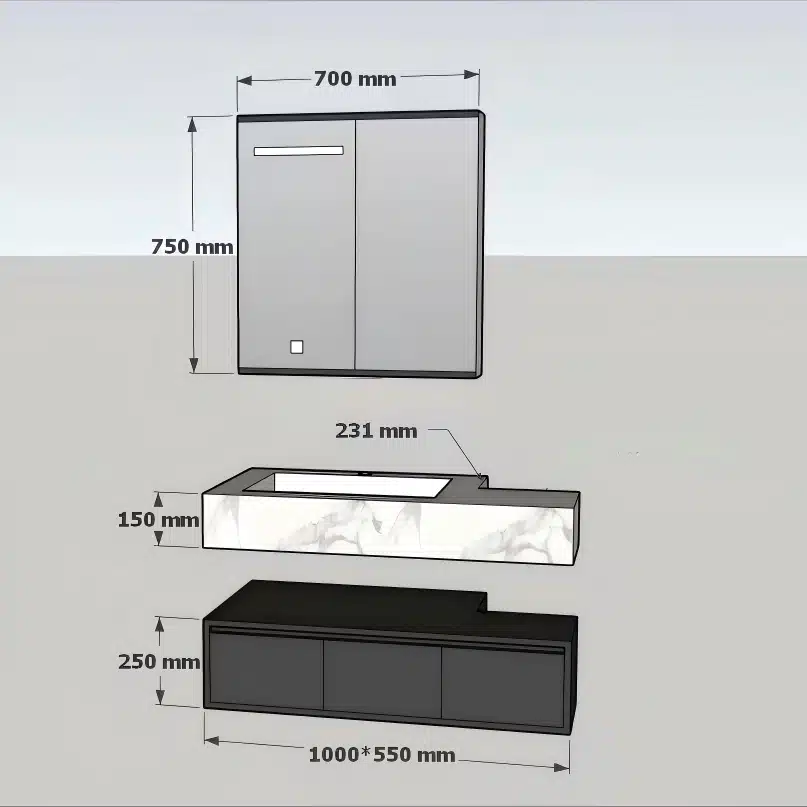
Standard Depth (21″): Use Cases and Considerations
The 21-inch (or 20-inch) depth is the industry benchmark for a reason. It provides ample countertop space on either side of the sink basin and supports a wide range of standard plumbing fixtures without feeling cramped. This depth is the default choice for primary or master bathrooms where functionality is key. The generous cabinet volume allows for substantial storage, and the countertop itself offers enough surface area for daily-use items. The main consideration is walkway clearance; in a standard 5-foot wide bathroom, a 21-inch vanity leaves just enough room for comfortable movement past other fixtures like a toilet or tub.
Narrow Depth (18″): Solutions for Compact Spaces
When every inch of floor space matters, an 18-inch narrow depth vanity is the correct tool for the job. It’s the standard solution for powder rooms, small guest bathrooms, or any layout where a standard vanity would obstruct a doorway or create a bottleneck. This reduction in depth is also critical for creating ADA-compliant bathrooms that require specific turning radii and clearances. The primary trade-off is reduced storage and a smaller sink basin. Faucet selection becomes more critical to prevent splashing, often requiring models with a shorter reach and a controlled stream.
Layout Impact: Comparing Clearance and Functionality
The three-inch difference between these two standards fundamentally changes how a bathroom feels and functions. In a narrow bathroom, a 21-inch vanity can make the space feel crowded and impede traffic flow, especially when cabinet doors or drawers are open. Switching to an 18-inch model can visually open up the room and make movement feel much more natural. You must weigh the value of countertop real estate against open floor space. For a high-traffic family bathroom, the clearance offered by a narrow vanity might be more valuable than the extra counter space of a standard one. Always maintain a minimum of 21-30 inches of clear walkway space in front of the vanity for practical use.
Stock Vanities Engineered to Boost Sales

Height Standards: Vessel vs. Undermount Sinks
The final sink rim height dictates vanity design: undermount sinks use a standard 32-36 inch counter height, while vessel sinks require a shorter cabinet to achieve the same ergonomic target.
Standard Countertop Height for Undermount Sinks
Undermount sinks are installed beneath the countertop, so the counter’s surface becomes the effective top of the sink area. This integrated design allows for a standard, ergonomic total height that fits most users. The industry standard for the finished height, measured from the floor to the sink rim, is between 32 and 36 inches. This range provides a comfortable level for daily tasks like washing hands without forcing users to bend over.
All our 2026 pre-built vanities designed for undermount basins are factory-calibrated to achieve this standard height, ensuring immediate user comfort and compliance with established ergonomic best practices.
Adjusting Vanity Height for Vessel Sinks
Vessel sinks sit on top of the counter, adding their own height to the total measurement. To maintain proper ergonomics, the vanity cabinet itself must be shorter than a standard model. The vanity base for a vessel sink is typically between 30 and 32 inches tall. The primary goal is for the top rim of the vessel bowl to reach a total height of approximately 34 inches from the floor.
We engineer our vessel-compatible vanities to account for typical bowl depths, which usually range from 4 to 6 inches. This foresight in design prevents the final installation from being too high for comfortable use.
ADA Compliance: The Universal Height Cap
Accessibility regulations establish a strict maximum height for sinks in public or commercial spaces to ensure usability for individuals in wheelchairs. The Americans with Disabilities Act (ADA) mandates that the top of the sink rim or counter surface cannot be higher than 34 inches from the finished floor. This regulation is absolute and overrides other design preferences for both undermount and vessel sink installations in any bathroom that requires accessibility.
All MFBATH commercial-grade vanities designed for the North American market in 2026 are engineered for full ADA compliance, meeting these critical accessibility standards out of the box.
Using “Filler Strips” for Alcove Installation
Filler strips are a non-negotiable component for alcove vanity installations, solving common issues like wall gaps, uneven surfaces, and ensuring long-term moisture resistance for a truly built-in finish.
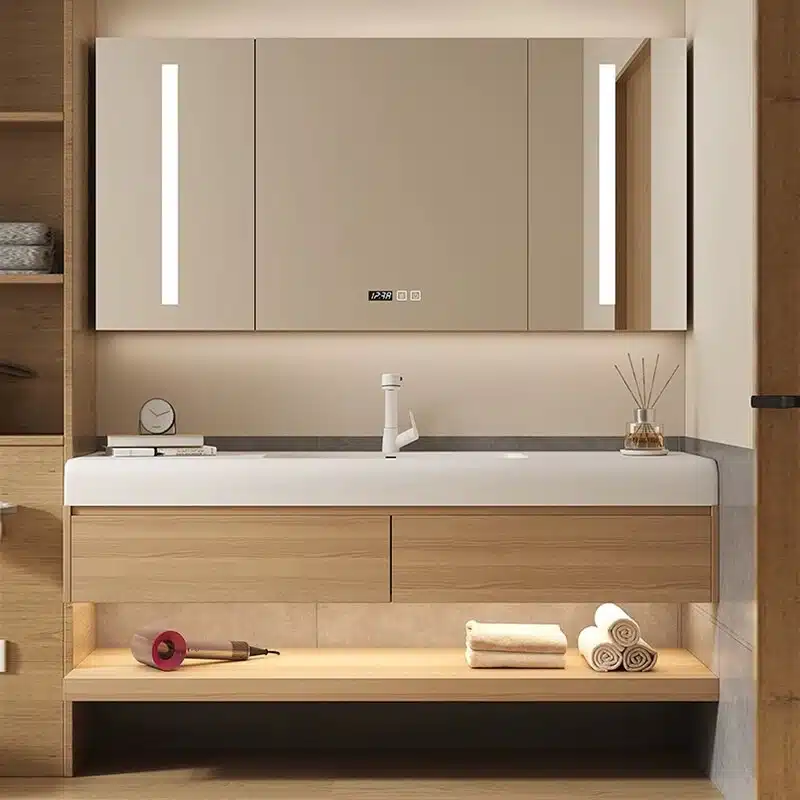
Closing Gaps for a Seamless Fit
When installing a vanity in an alcove—a three-walled space—gaps between the cabinet and the wall are almost unavoidable. Filler strips are precision-cut pieces of material designed to cover these spaces, creating a flush, integrated appearance. This isn’t just cosmetic; these strips provide critical support that helps installers level the cabinet and distribute its weight properly, preventing stress on the unit over time.
| Filler Strip Material | Primary Application | Durability Note |
|---|---|---|
| PVC (High-Density) | Completely waterproof, making it the top choice for humid climates and high-moisture bathrooms. | Offers maximum protection against water ingress at the wall joint. No sealing of the material itself is required. |
| Plywood (Water-Resistant) | Provides excellent structural strength and holds screws securely for a rigid installation. | The cut edges facing the wall must be sealed with a water-resistant sealant to prevent potential delamination. |
| HMR MDF | Delivers the smoothest surface for a flawless painted finish, matching high-gloss lacquered vanities perfectly. | Requires meticulous sealing on all sides and edges to protect the core from direct moisture contact. |
Scribing for Uneven Walls
No wall is perfectly straight. To achieve a professional fit, installers use a technique called scribing. This involves holding the filler strip against the wall and tracing the wall’s exact contour onto the strip with a compass or scribe tool. The strip is then cut along this line, creating a custom shape that fits snugly against the wall’s imperfections. This meticulous process eliminates visible gaps and produces a seamless transition from the vanity cabinet to the wall surface.
Moisture Protection in Wet Areas
In any bathroom, the joint where the vanity meets the wall is a potential weak point for moisture penetration. Protecting the filler strip is essential for long-term durability. Installers apply a bead of clear or paintable water-resistant sealant along the edge where the scribed filler meets the wall. This creates a barrier that prevents water from seeping behind the cabinet and causing damage. Choosing a core material designed for humid environments, like high-density PVC, provides the highest level of defense against moisture-related issues.
Door Swing Clearance & Drawer Extension
Functional bathroom layouts are now dictated by accessibility standards, which determine the minimum space required for safe movement and directly influence hardware specification.
Planning for door and drawer movement is not about guesswork; it’s a technical discipline governed by established standards. Failing to account for clearance creates unusable spaces, warranty claims, and negative customer experiences. The difference between a functional vanity and a frustrating one is often a matter of inches and the right hardware. These details are critical for both single-family homes and large-scale commercial projects where usability is paramount.
ADA Accessibility Standards for Clearances
By 2026, accessibility compliance is the primary driver for door and drawer clearances in both commercial and residential construction. These standards are no longer niche; they represent best practices for universal design, ensuring layouts accommodate users with mobility devices by defining the minimum space for safe movement. Regulations mandate clear doorway widths of 32 to 36 inches and maneuvering clearances of at least 42 to 60 inches, depending on the approach. Adhering to these specifications from the start prevents costly layout revisions and creates a more functional end product for everyone.
| Hardware Component | Standard Specification (Default) | Upgraded Specification (ADA & Premium Builds) |
|---|---|---|
| Door Hinges | Branded Soft-Close. Reliable for standard use but the door itself can obstruct the opening. | Swing-Clear Hinges (DTC/Blum options). Moves the door completely out of the opening, maximizing clear pathway. |
| Drawer Slides | Silent Soft-Close Sliders. Good functionality but may offer only 3/4 extension. | Full-Extension Silent Sliders (DTC/Blum options). Allows complete access to drawer contents without obstructing traffic. |
Hardware Solutions for Maximizing Space
Modern hardware engineering provides practical solutions for optimizing clearance in compact bathrooms. Components like swing-clear hinges and full-extension drawer slides are essential for creating barrier-free layouts. These are not just premium upgrades; they are functional necessities for meeting accessibility standards while maintaining a clean aesthetic. Specifying the right hardware from the factory level is a critical decision for any B2B buyer.
- Swing-clear hinges move the entire door out of the cabinet opening, maximizing the usable pathway and preventing collisions.
- Full-extension drawer slides allow users to access the entire drawer, which is crucial for storage efficiency in tight spaces.
- Choosing quality hardware like DTC or Blum ensures longevity and smooth operation, directly impacting the end user’s perception of quality.
Functional Layout Considerations
Effective bathroom design goes beyond basic measurements. It accounts for subtle but critical details that impact daily use. This includes the force needed to operate doors and drawers, the height of thresholds, and the interaction between different moving components. A well-planned layout ensures a fully opened vanity door doesn’t block access to a fully extended drawer or another bathroom fixture like the toilet or shower door.
- The operating force for doors and drawers should not exceed 5 pounds to ensure ease of use for all individuals.
- Thresholds into the bathroom are limited to a maximum height of ½ inch to prevent tripping hazards.
- Designers must verify that door swings and drawer extensions do not conflict with each other or with other fixed elements in the room.
Mirror & Lighting Proportions relative to Vanity
Properly sizing and placing mirrors and lights is not just an aesthetic choice; it’s a functional requirement for creating a shadow-free, well-balanced task area.

Fixture Sizing Guidelines
To maintain visual balance, the size of your lighting fixture must be proportional to your mirror. The industry standard is to select a fixture that is roughly 75% of the mirror’s total width. This ratio ensures the light source complements the vanity area without overpowering it or appearing undersized, which would create poor light distribution.
- A light fixture measuring about three-quarters of the mirror’s width creates a harmonious look.
- This proportion ensures the light spread is functional for the entire vanity space.
Height and Placement Standards
Correctly positioning your lights is essential for effective illumination. The ideal height depends on the fixture type, with most installations placing lights between 65 and 80 inches from the floor. This aligns the light source with the user’s face, preventing the harsh top-down shadows that make grooming tasks difficult.
- Overhead lights are typically centered above the mirror.
- Side sconces work best when their vertical center is at eye level, flanking the mirror.
- Proper height prevents casting harsh shadows on the face.
Spacing Sconces for Shadow-Free Lighting
Using side-mounted sconces is the most effective way to achieve even, shadow-free light for tasks like shaving or applying makeup. The distance between the sconces is critical for balanced illumination and avoiding uneven bright spots. Placing them too close or too far apart defeats their primary purpose.
- For optimal results, space two side sconces between 28 and 36 inches apart.
- This arrangement provides balanced, cross-directional light that minimizes facial shadows.
- Ensure the sconces are an equal distance from the mirror’s centerline.
Custom Sizing: When is it Worth It?
Custom sizing is a strategic tool, not just a luxury. It solves complex architectural problems and offers distributors a low-risk path to higher margins by serving specialized market demands.
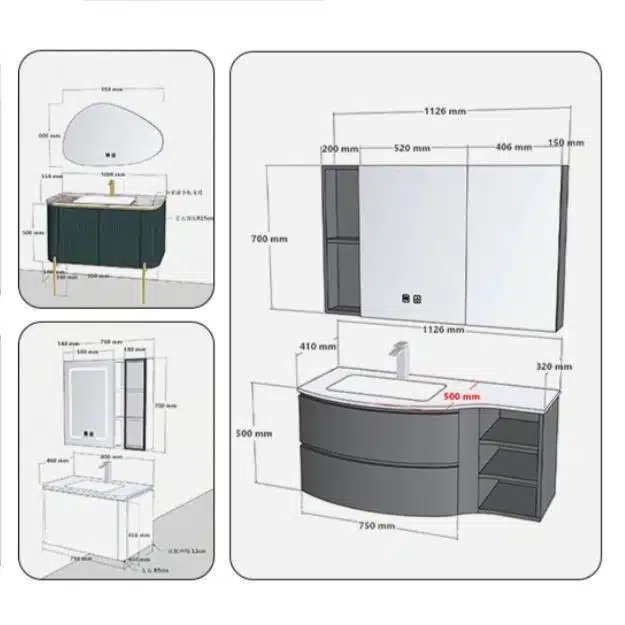
Solving Non-Standard Spaces & Unique Designs
Custom sizing is the most practical solution for projects with architectural constraints. In buildings with alcoves, sloped ceilings, or unconventional layouts, standard-sized vanities simply don’t work without significant compromises. A custom-fit unit allows contractors to use every inch of available space, delivering a clean, built-in appearance that looks premium and increases the property’s final value. This approach is essential for navigating the realities of older buildings or high-end designs where off-the-shelf products fall short.
- Fits perfectly into alcoves or between walls, eliminating the need for large, awkward filler strips.
- Adapts to challenging plumbing configurations or the structural quirks found in historical renovations.
- Enables unique, bespoke designs for boutique hotels or luxury homes that demand a specific aesthetic that standard vanities cannot provide.
The Financial Case: Higher Margins and Lower Returns
While custom vanities carry a higher unit cost, they generate superior financial returns. The market data is clear: custom-fit furniture can command price premiums of 20% or more. Customers who require tailored solutions are typically less price-sensitive and more focused on quality and a perfect fit. This directly boosts profitability for distributors. More importantly, it nearly eliminates returns caused by incorrect sizing—a significant and often hidden cost in the furniture and fixtures business. A perfect fit on the first delivery builds brand loyalty and avoids the logistical expense of shipping replacements.
Market Testing with Low Minimum Orders
For distributors, custom sizing is a powerful tool for market intelligence. We designed our production model to support this. With a low minimum order quantity (MOQ) of just 10-20 units, our partners can test unique designs or non-standard dimensions in their local markets without committing to a full container of inventory. This material flexibility removes the financial risk of exploring new niches. You can gauge local demand for an unusual size or style, gather customer feedback, and only scale up production once you have validated the market. This gives you a clear competitive advantage over larger suppliers who are locked into mass-produced standard sizes.
Conclusion
Mastering vanity dimensions ensures every bathroom project is successful. Details like door swing clearance, filler strip sizing, and mirror proportions prevent installation problems. This careful planning creates a layout that is both functional and visually balanced for the end user.
For your next project, consider how our material flexibility can meet your specific design and budget goals. Contact us to discuss your requirements or to order a refundable sample and test our quality firsthand.
Frequently Asked Questions
How much space do I need for vanity door swing?
To ensure full functionality, you should plan for at least 21 to 30 inches of clear floor space in front of your vanity. This provides enough room for the cabinet doors to swing open completely without obstruction and allows for comfortable access to the sink and countertop.
What is a vanity filler strip used for?
A vanity filler strip is a narrow piece of finished wood used to close the gap between the vanity cabinet and an adjacent wall. Its primary purpose is to create a clean, built-in appearance and ensure that cabinet doors or drawers can open fully without their handles hitting the wall, which is crucial in tight installations.
Standard depth of a bathroom vanity?
The standard depth for a bathroom vanity cabinet is 21 inches from front to back. This size accommodates most sink and faucet configurations comfortably. However, for more compact spaces like powder rooms, shallower models are available, typically ranging from 16 to 18 inches deep.
How big should a mirror be over a 30 inch vanity?
For a 30-inch vanity, the mirror width should typically be between 26 and 28 inches. A common design rule is to choose a mirror that is slightly narrower than the vanity itself to create a balanced look. If you opt for a frameless mirror, it can match the vanity’s 30-inch width for a more contemporary, seamless appearance.
Can I put a 30 inch vanity in a 30 inch space?
While it is technically possible, installing a 30-inch vanity into an exact 30-inch alcove is not recommended. Walls are rarely perfectly straight, and forcing the cabinet into a tight space can cause damage. The industry best practice is to use a slightly smaller vanity and cover the remaining gaps on each side with filler strips for a professional, built-in finish.
Correct height for vanity light above mirror?
The standard height for a vanity light fixture mounted above a mirror is 75 to 80 inches from the finished floor to the center of the light fixture. This placement ensures the light illuminates your face evenly from above, minimizing shadows. Always center the fixture with the mirror and vanity for a balanced aesthetic.




0 Comments